
Connecting your Account
You'll need to authorize Dext Commerce to connect the Amazon Seller Marketplace account. Follow the simple steps below:
In order to use Amazon Seller with Dext Commerce, your account must meet the following requirements:
- You must have Super-Admin (store owner) access
- You must have a Pro Seller subscription and be using Amazon Seller Central Marketplace or Amazon Handmande
- You will need to do provide access for each region you intend to connect.
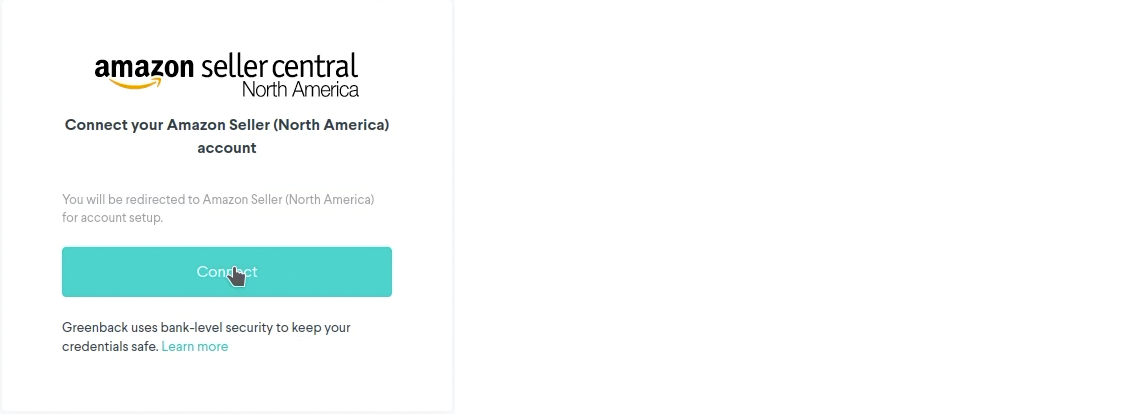
- In the sidebar, navigate to Sales > New Connect and select Sales

- Choose Amazon Seller Central with the region you wish to connect.

- Select Connect
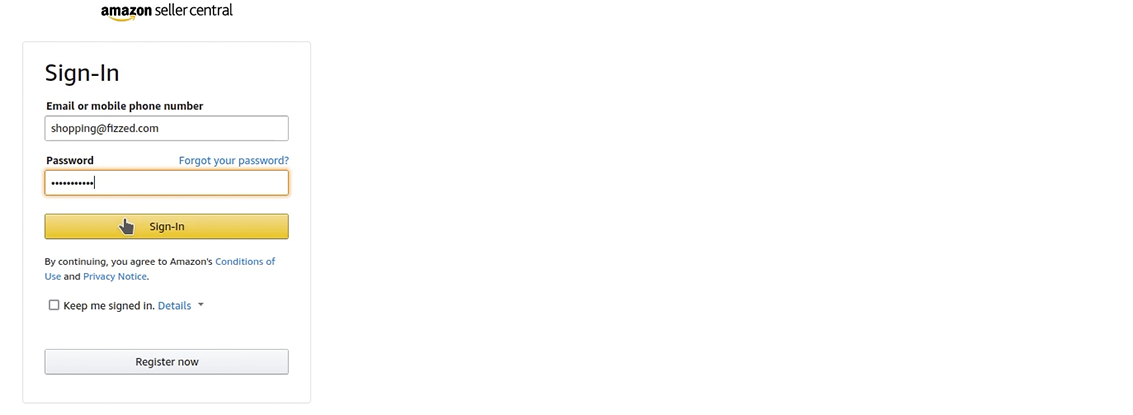
- You will be redirected to an Amazon Seller authorization page. Enter your Amazon Seller credentials and select Sign-In
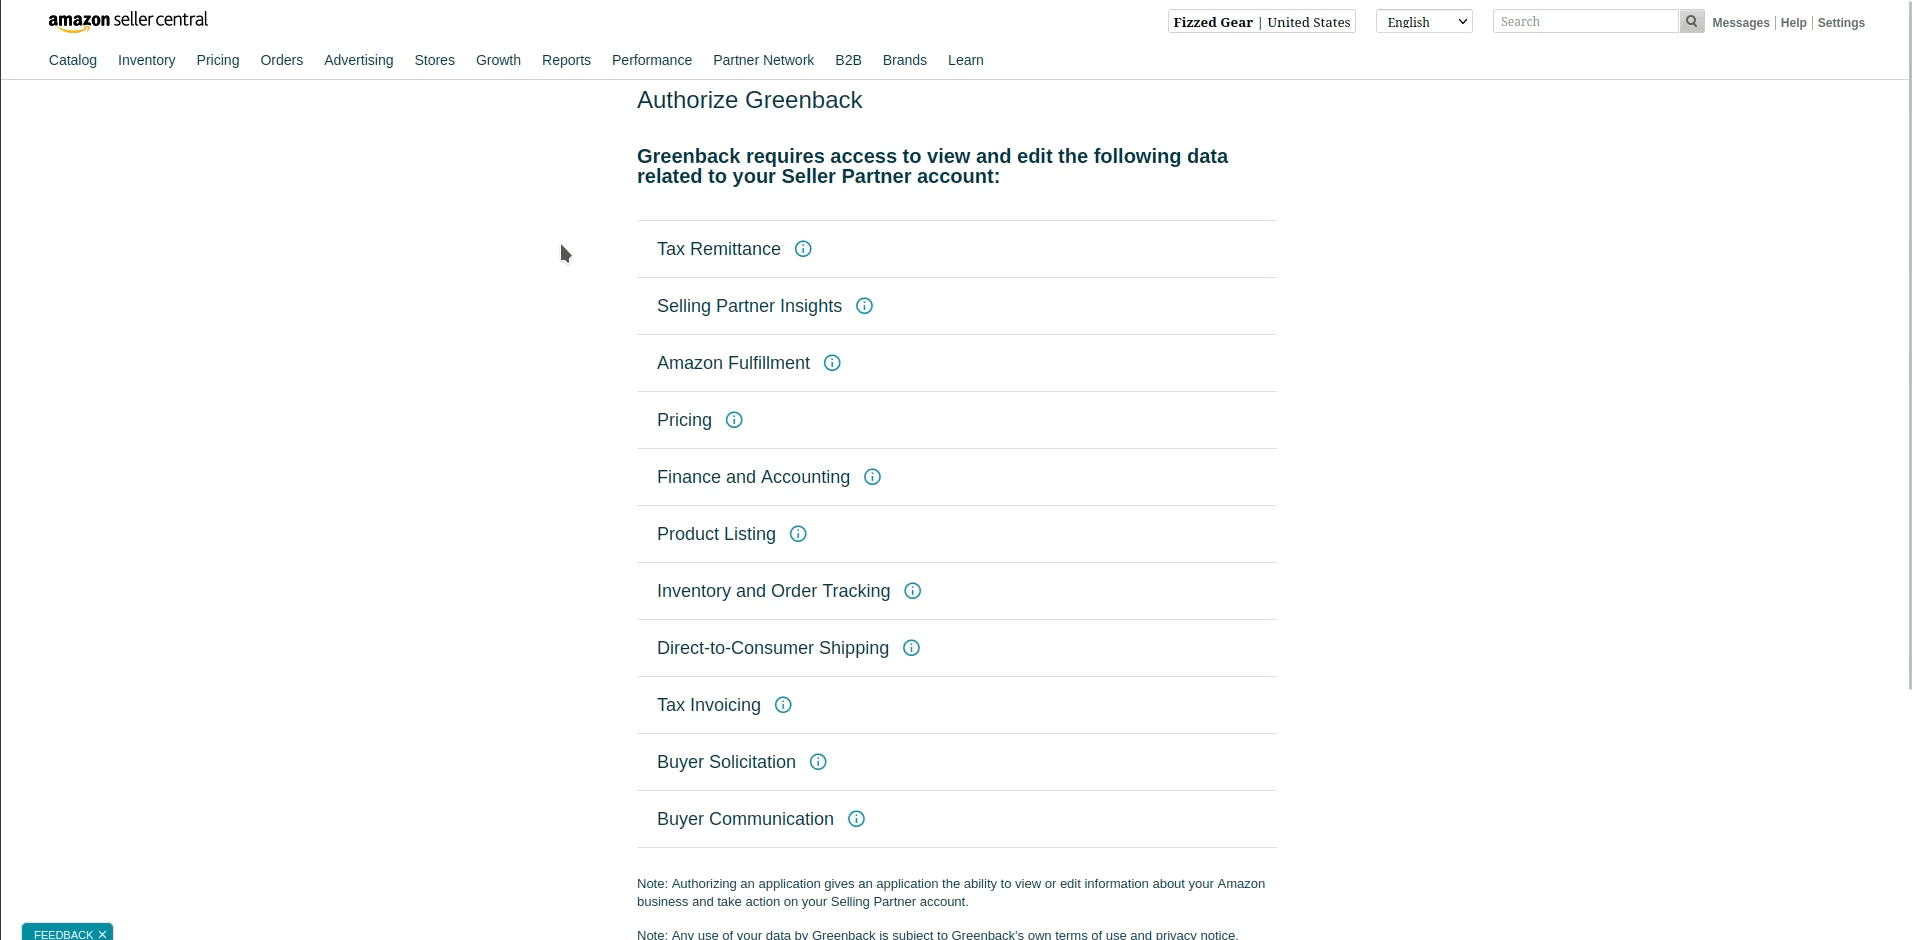
- Review the terms, and check the authorization box at the bottom. Then select Confirm
- Commerce will begin to fetch your transaction data.

How to Unarchive Amazon Statements
If you need Amazon Seller Central statements containing transactions older than 90 days, you need to request them from Amazon. By default, Amazon archives statements after 90 days.
Follow these steps to unarchive your Amazon Seller Central statements:
- Login to your Amazon Seller account
- Click Reports > Payments
- Click All Statements
- Locate the desired time frame(s) then click Request Report
Important Note: Make sure you find ALL the reports for your requested time range, or our system will not be able to pull your requested data.
Keep in mind that settlement reports may have beginning dates before the dates you request, those reports will need to be unarchived as well. Additionally, keep in mind that all reports for your requested time frame will need to be unarchived. For instance, if you use Amazon Seller Europe, and request historical data for your UK Amazon store, you will still need to check Amazon FR and Amazon DE etc. to see if any Amazon reports need to be unarchived for the requested time period, even if you don't typically sell in those regions. Another place that reports may be hiding is in the dropdown for "Account type", there may be a report for a single invoice based sale, even if you don't typically do business in that way
Once unarchived, Greenback is able to access the transactional data. Amazon will archive them again in 90 days, but the data will now remain in Greenback.
While they are accessible, you are essentially sharing them with Greenback just like they were new transactions being auto-fetched for you. There's no need to worry about duplicates; Greenback always searches for matching transactions and prevents them.
Legacy Method (Developer ID)
As of July 26th, this method is will no longer be used for Amazon Seller connections. Instead, connections will use Amazon's new OAuth 2.0 API.
Requirements
- You must have Super-Admin (store owner) access
- You must have a Pro Seller subscription and be using Amazon Seller Central Marketplace or Amazon Handmande
- You will need a merchant/seller ID if you do not already have one
- You will need to do provide access for each region you intend to connect
Regions Applicable
- North America: Canada, Mexico, United States
- Brazil
Authorizing a store in Amazon's North America Region (Canada, Mexico, United States) will allow Commerce to fetch data from all of those 3 countries - you do not need to authorize each individually.
From your Amazon Seller Central dashboard:
- Go to App Store, then click on "Manage Your Apps" from the menu.
- Next, click on the “Authorize New Developer”
- On the Authorize New Developer screen, copy/paste the developer name Commerce and the developer id 356525836929 into the fields and click Next.
- Find the Amazon Seller ID (at the top) and MWS Auth Token (at the bottom) that you created. Keep the tab open so that you can copy/paste them next.
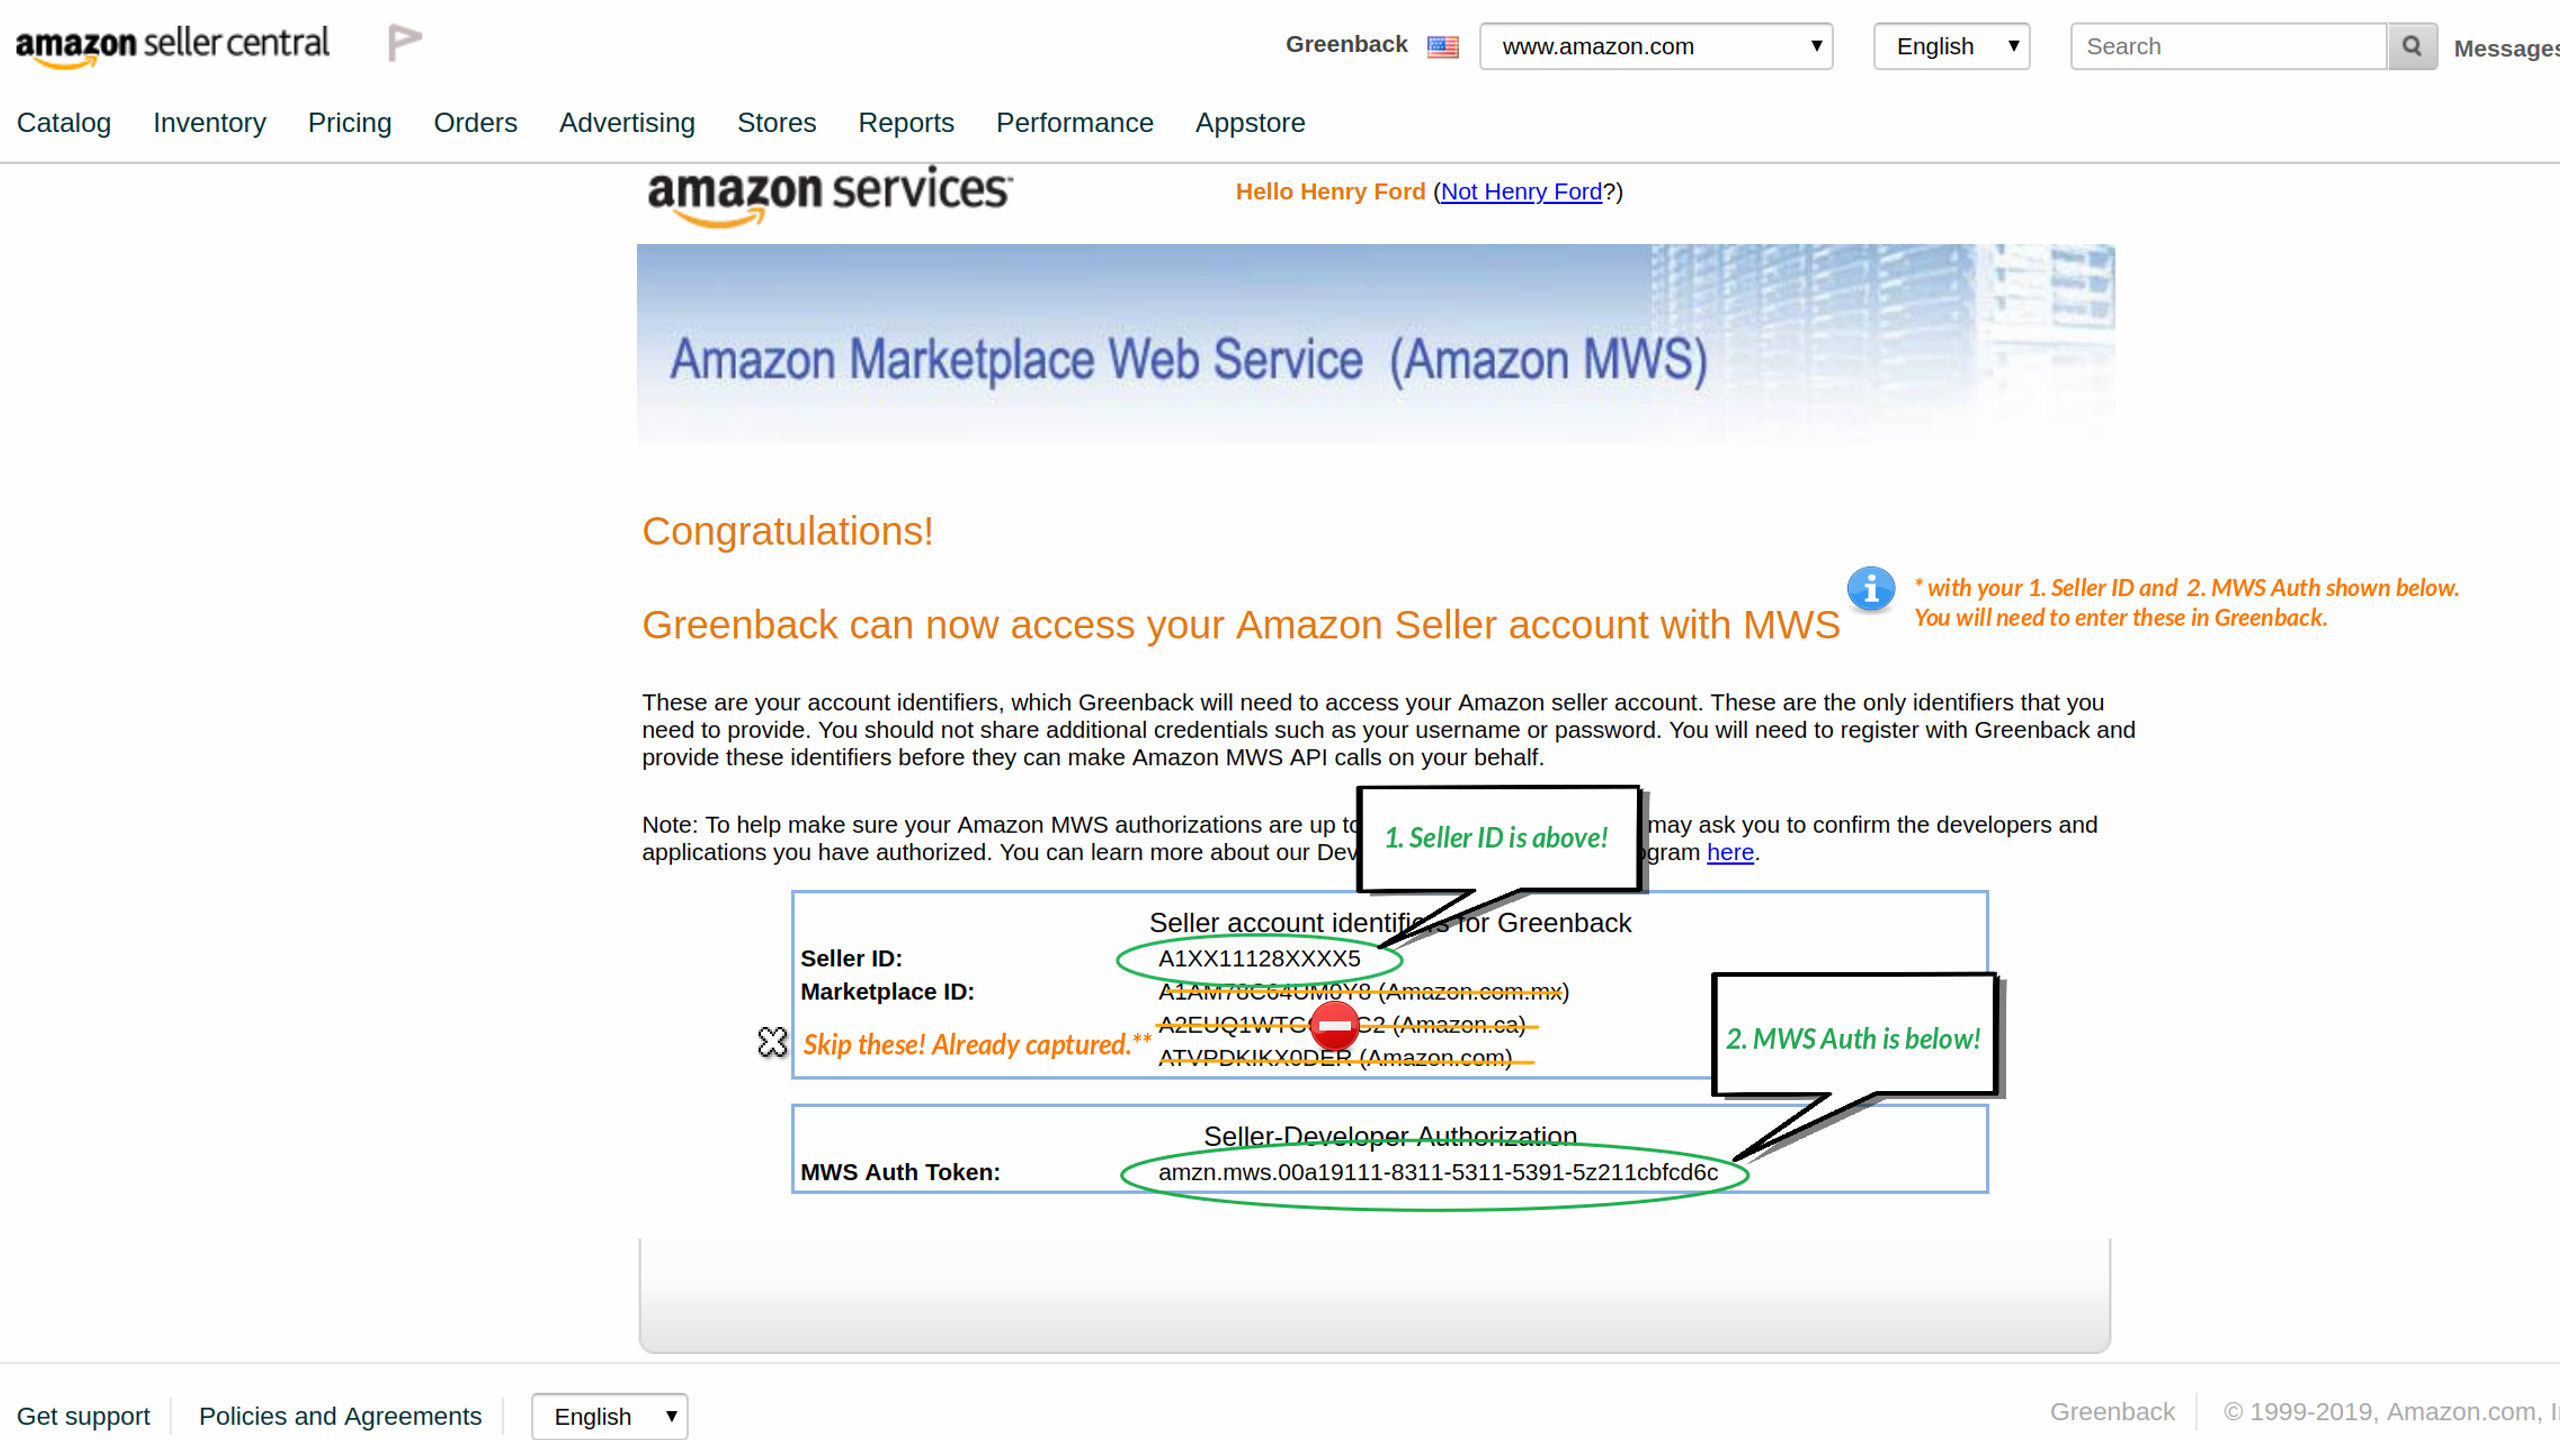
- Setup your account on Commerce. In the connect box, copy/paste your seller ID and auth token into their respective fields and click Connect.
Amazon Seller Central (Europe)
Regions Applicable:
- Europe: United Kingdom, Italy, France,Germany, Netherlands, Poland, Spain
- Egypt
- India
- Saudi Arabia
- Turkey
- United Arab Emirates
From your Amazon Seller Central dashboard:
- Go to App Store, then click on "Manage Your Apps" from the menu.
- Next, click on the “Authorize New Developer”
- On the Authorize New Developer screen, copy/paste the developer name Commerce and the developer id 570047433434 into the fields and click Next.
- Find the Amazon Seller ID (at the top) and MWS Auth Token (at the bottom) that you created. Keep the tab open so that you can copy/paste them next.
- Setup your account on Commerce.
Amazon Seller Central (Australia)
Regions Applicable
From your Amazon Seller Central dashboard:
- Go to App Store, then click on "Manage Your Apps" from the menu.
- Next, click on the “Authorize New Developer”
- On the Authorize New Developer screen, copy/paste the developer name Commerce and the developer id 796434457486 into the fields and click Next.
- Find the Amazon Seller ID (at the top) and MWS Auth Token (at the bottom) that you created. Keep the tab open so that you can copy/paste them next.
- Setup your account on Commerce. In the connect box, copy/paste your seller ID and auth token into their respective fields and click Connect.