New to Greenback? This article will help you understand how to use Greenback to automate your expenses.
Connect an Accounting Program
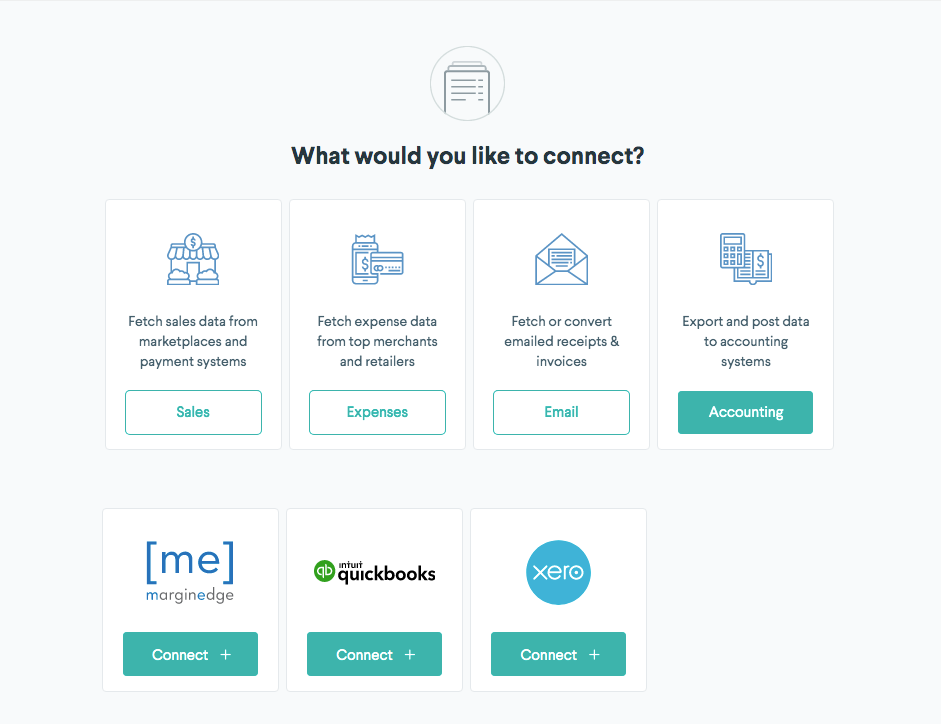
The first step to using Greenback is to connect an accounting program. When you connect an accounting program such as QuickBooks, Greenback will import the list of accounts from your "chart of accounts." These accounts are used later when you export data to the accounting file. With Greenback you can add multiple accounting files as needed.
- Click the Accounting
 icon.
icon. - Choose New >> Accounting from the drop-down menu.

From here you can choose the preferred accounting program from the list of supported integrations.
Advanced Users: Each connected accounting program will include an Export Preferences section that gives you control over a number of export options.
-> Learn more about export preferences
Connect your retailer accounts
To automatically fetch itemized receipts from top retailers, simply connect the accounts you use most from a growing list of supported retailers.
- Click the Expenses
 icon.
icon. - Choose New >> Expense from the drop-down menu.
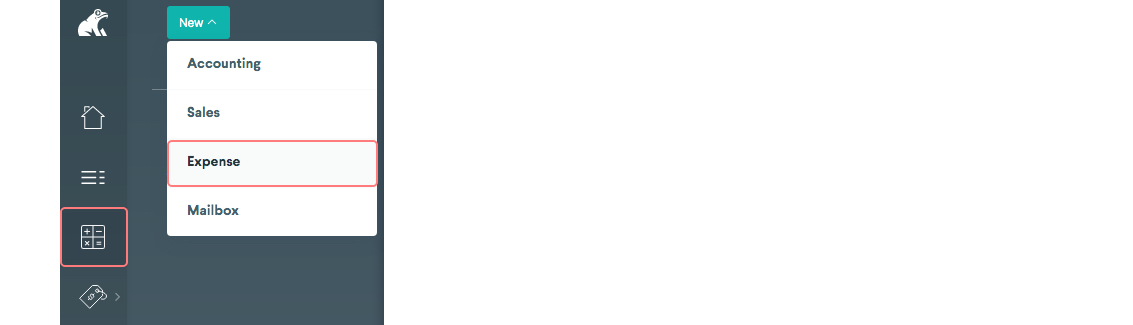
From here you can connect the desired retailer.
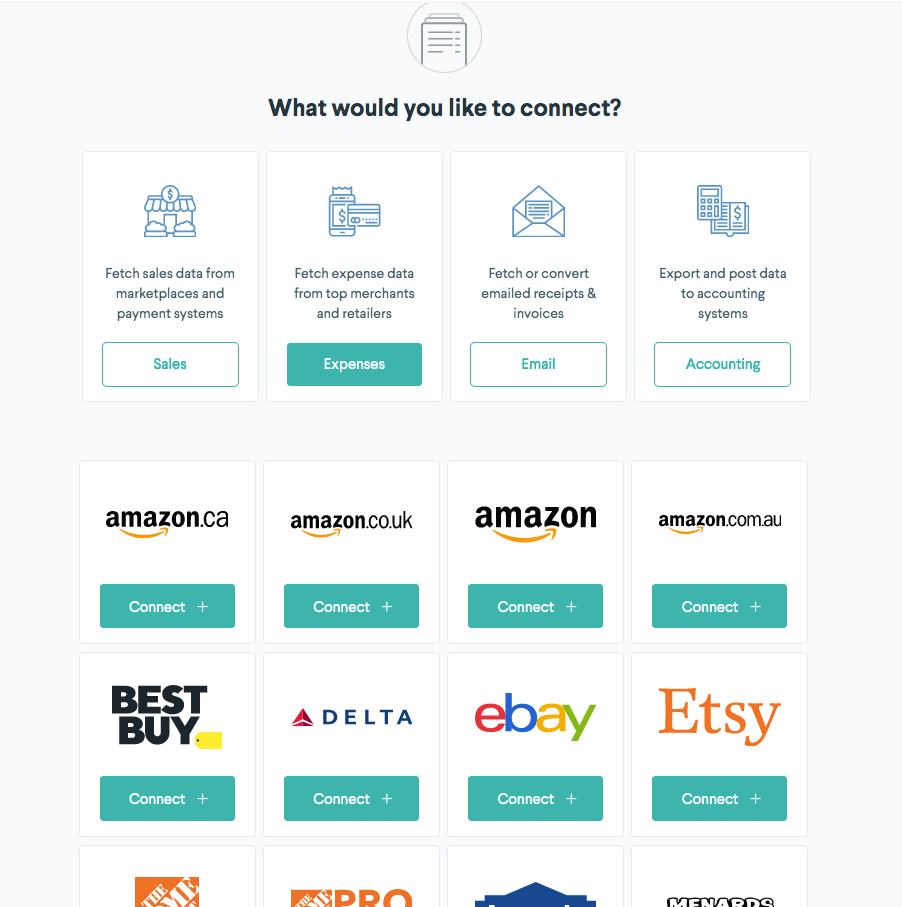
Repeat the steps for each retailer you want to connect.
Need historical data? Request a Catch Me Up
Do you need data prior to signing up with Greenback? Paid plans include a limited set of historical data. If you need more, request an extended Catch Me Up, starting at $49.00 for the first 500 transactions. Additional historical transactions can be fetched at a cost of $0.03 each. Historical Catch Me Ups are performed by a support engineer to ensure accuracy and completion of data.
If you require historical data please submit a Catch Me Up request by email at support@greenback.com
Review your data
Once you connect your retail accounts, simply view each account to see your transactions.
![]()
Note: You will only see the most recent five or so historical transactions as well as new transactions going forward. If you need additional historical data, please check out our Catch Me Up feature.
-> Learn how to search and filter your transactions
Connect Mailbox
If you have email or paper receipts, you can use a Greenback Mailbox to quickly convert those receipts into transactions that can easily be imported to an accounting program.
To create a new mailbox account, click the wallet icon -> choose new/mailbox from the top drop-down menu. From here you can connect a new Mailbox account.
Note: Once you have created a new Mailbox account. You can simply forward emails to the email address assigned to your Mailbox. You can forward emailed receipts, including those with attachments to your mailbox. You can also forward any image receipts, including those taken from your smart phone.
-> Learn more about using Mailbox here.
-> Configure automated forwarding rules for your email
Prepare & convert email receipts
In some cases, Greenback will not be able to automatically convert your emailed receipts into "ready to export" transactions. Not to worry though! You can easily transform these receipts yourself. Check out this guide for more information on how to convert emailed receipts into transactions ready to export to your accounting.
-> Learn how to convert your emailed receipts
Export transactions to accounting
Exporting transactions to your accounting program is easy. You can export transactions individually or in bulk.
Individual export
To export transactions individually, just click the "export" button associated with the transaction. Next, choose the accounting file you wish to receive the transaction. Lastly, choose the appropriate payee/contact, the appropriate bank or credit card account used, and then the appropriate expense account category. If you are exporting in itemized mode, you'll be able to choose an expense account category for each item on the transaction.
Export in bulk
To export transactions in bulk, just click the "paper airplane" icon from the left menu and choose the accounting file you wish to receive the transactions. From here you can filter transactions by account or mailbox, date range as well as a number of other filters.
Greenback will attempt to automatically assign the contact, bank/credit card account as well as the expense account category for each transaction. You can also override any categorization as needed. Greenback will learn how you categorize transactions for future use - making it easier over time to automate your exports.
How export mappings work
Greenback will attempt to default your categorization based on previously exported transactions. You can also leverage SKU matching to automatically categorize expenses based on products/services from your accounting file. You can also take advantage of Greenback export mapping rules by contacting support with your specific use case.
-> learn more about SKU matching
-> Learn more about export preferences
A word about transforms
Transforms are used to normalize and modify data before exporting to an accounting file. Greenback's powerful rules-engine intelligently matches transactions and can transform the transaction data based on your business use case. Transforms are great for dealing with missing tax data, including meta-data attributes as part of the transaction data and more.